From dull to dreamy: Sophie’s master bedroom transformation
Written by Sophie Clemson
My fiancé, Liam, and I moved into our new home a year ago, wow, how time flies! Our house was built in the 1970s, a style I’ve never been particularly drawn to since I love period properties. However, where I live, they are few and far between, and unfortunately, period homes were out of our budget for our second home. I saw this as a challenge and wanted to bring our own character and personality to what was once a very grey and dull 1970s house. While our home may lack traditional character, it more than makes up for it with its spacious rooms and the abundance of natural light pouring in through the large windows
One of the room transformations I’m most proud of in our home is our master bedroom. It’s my happy place. Warm, cosy, and the perfect retreat after a long day! When we moved in, the entire house was white and grey, and the master bedroom was no exception. It felt cold and lacked personality, it needed an injection of warmth!
In this week's blog, I'm sharing the transformation of my master bedroom, not just the before and after photos, but the process and what it’s like as an interior designer making changes to your own home.
Let's start from the beginning…
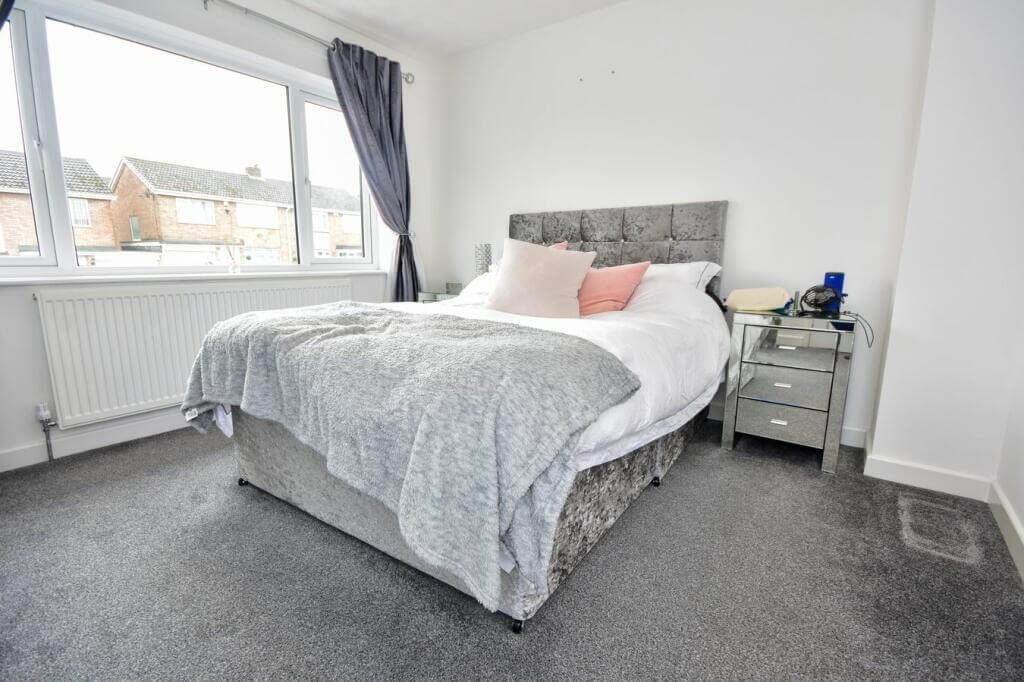
Before - image from Rightmove listing
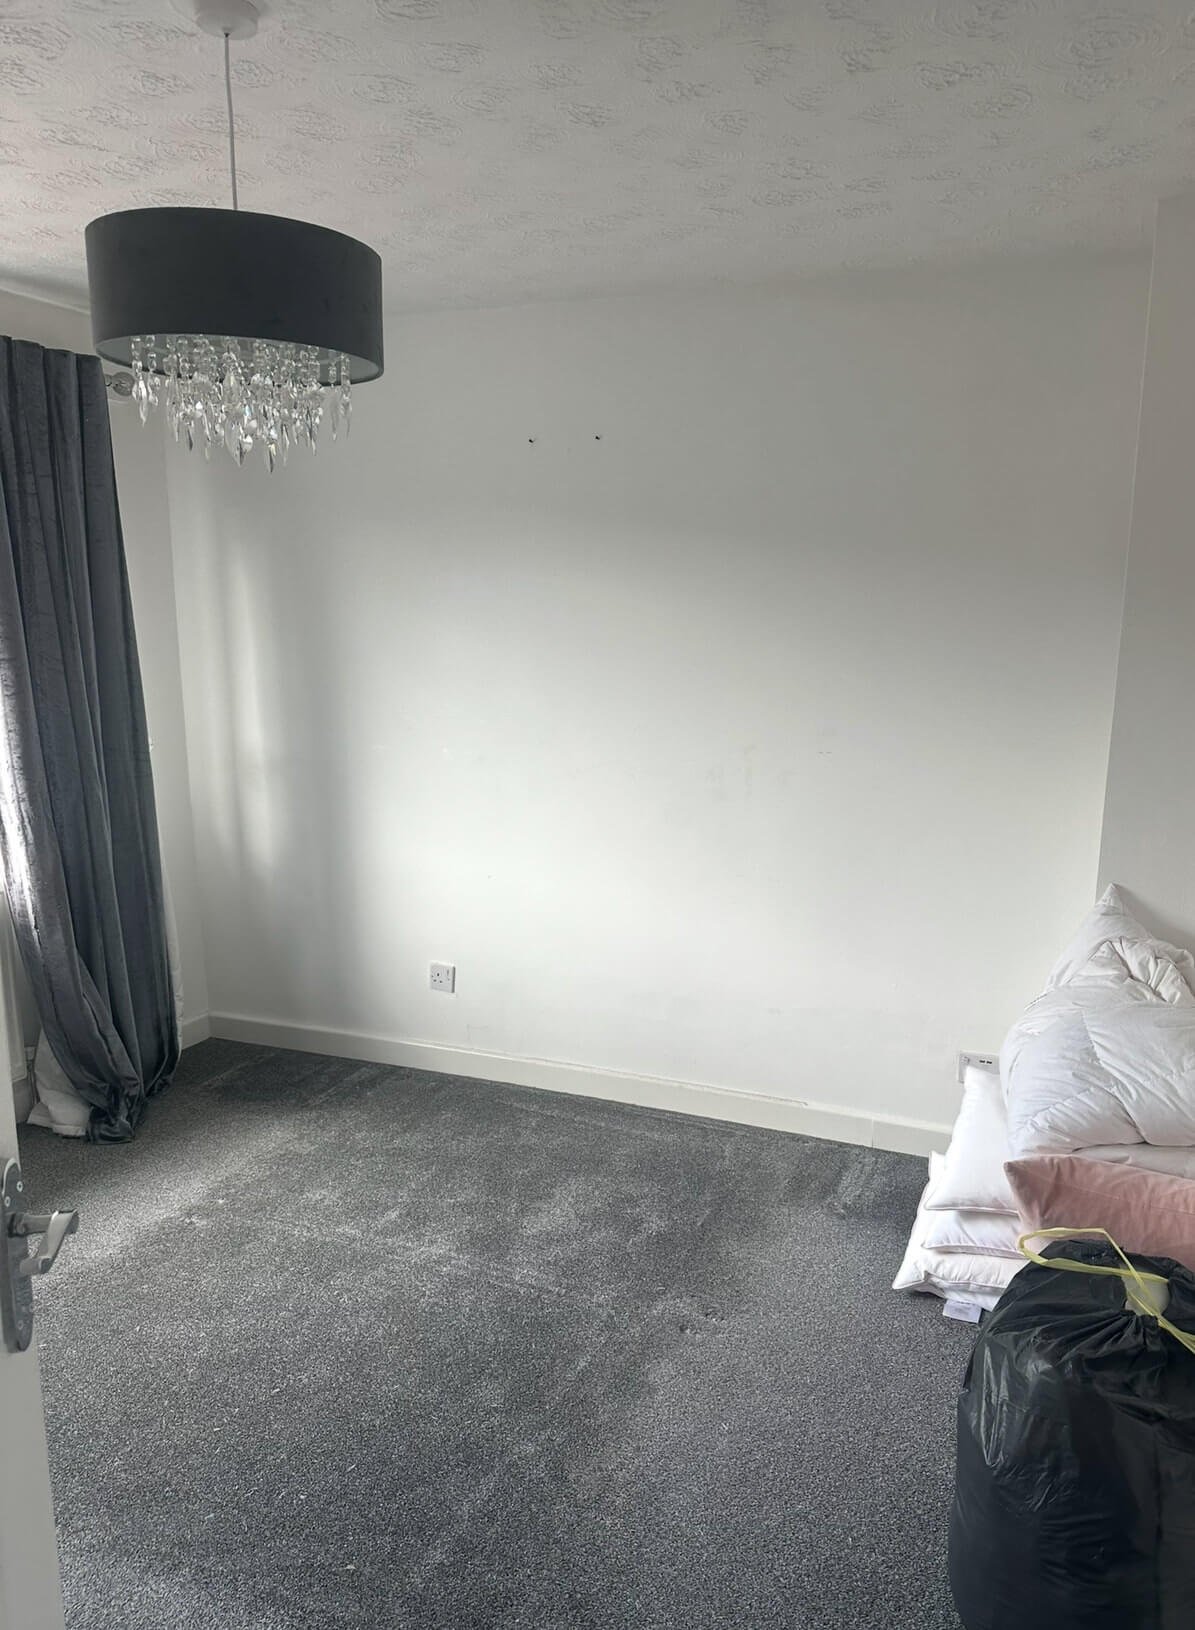
Before - moving in day!
Just like our customers, I’ve felt that overwhelming feeling when making changes to my home even as an interior designer, because there are so many decisions to be made whether that’s changing one room or multiple. You can often feel like you’re going round in circles.
This will hopefully be our family home, so when it comes to making design decisions, I’ve carefully considered longevity, opting for scrubbable paint finishes, stain resistant fabrics, and neutral colours for investment pieces like made to measure Roman blinds. Since I’m getting married this year, balancing home updates with wedding planning has made me especially mindful of budget. Thankfully, I’ve found some amazing gems on Facebook Marketplace that have worked out brilliantly and saved me sooo much money!
I had a vision and brief for my master bedroom. I wanted it to have character, feel cosy, warm, and inviting, and knew I wanted to incorporate wallpaper and panelling to achieve this. Before I could get stuck into the fun part of choosing paint colours, and everything else for the room, there was something that had to go in my 1970s bedroom - the artex swirled ceiling, which made the space feel incredibly dated. The artex was in every room, so we had the ceilings boarded and plastered, which has made such a difference to the overall look.
As the layout of my master bedroom was quite simple, I began my design by choosing a wallpaper, as it would help create a colour palette for the entire room. After trying a few samples, I decided on the beautiful Linnea wallpaper by Sandberg. It’s a floral print that has such a restful feel - perfect for the calm and serene bedroom I wanted to create.

Image source: Sandberg Wallpaper
Do you struggle to visualise how your room could look? We can help you, click here.
I shared the wallpaper with my design friends, Catherine and Becky, to get their ideas on paint colours. It’s always helpful to bounce ideas around and gather different perspectives before making a decision. After all, who better to ask than interior design experts?
What’s great about this wallpaper is that it offers plenty of options for paint colours. You could highlight the greens, blues, neutrals, or pinks. After exploring several shades and ordering samples, I chose the beautiful Blue Gray and Joas White. Blue Gray is one of my favourite Farrow & Ball colours, it’s an intriguing shade that shifts between blue and green depending on the natural light throughout the day, which I love! Joas White, is a gorgeous warm neutral that perfectly complements Blue Gray.

Checking the wallpaper and paint colours in the room and in different lights
Once I started building up my design, I created a moodboard to see the overall look, like we do for our customers. It’s so helpful to see all the elements that make the design come together, for a clear vision of how the room will look.
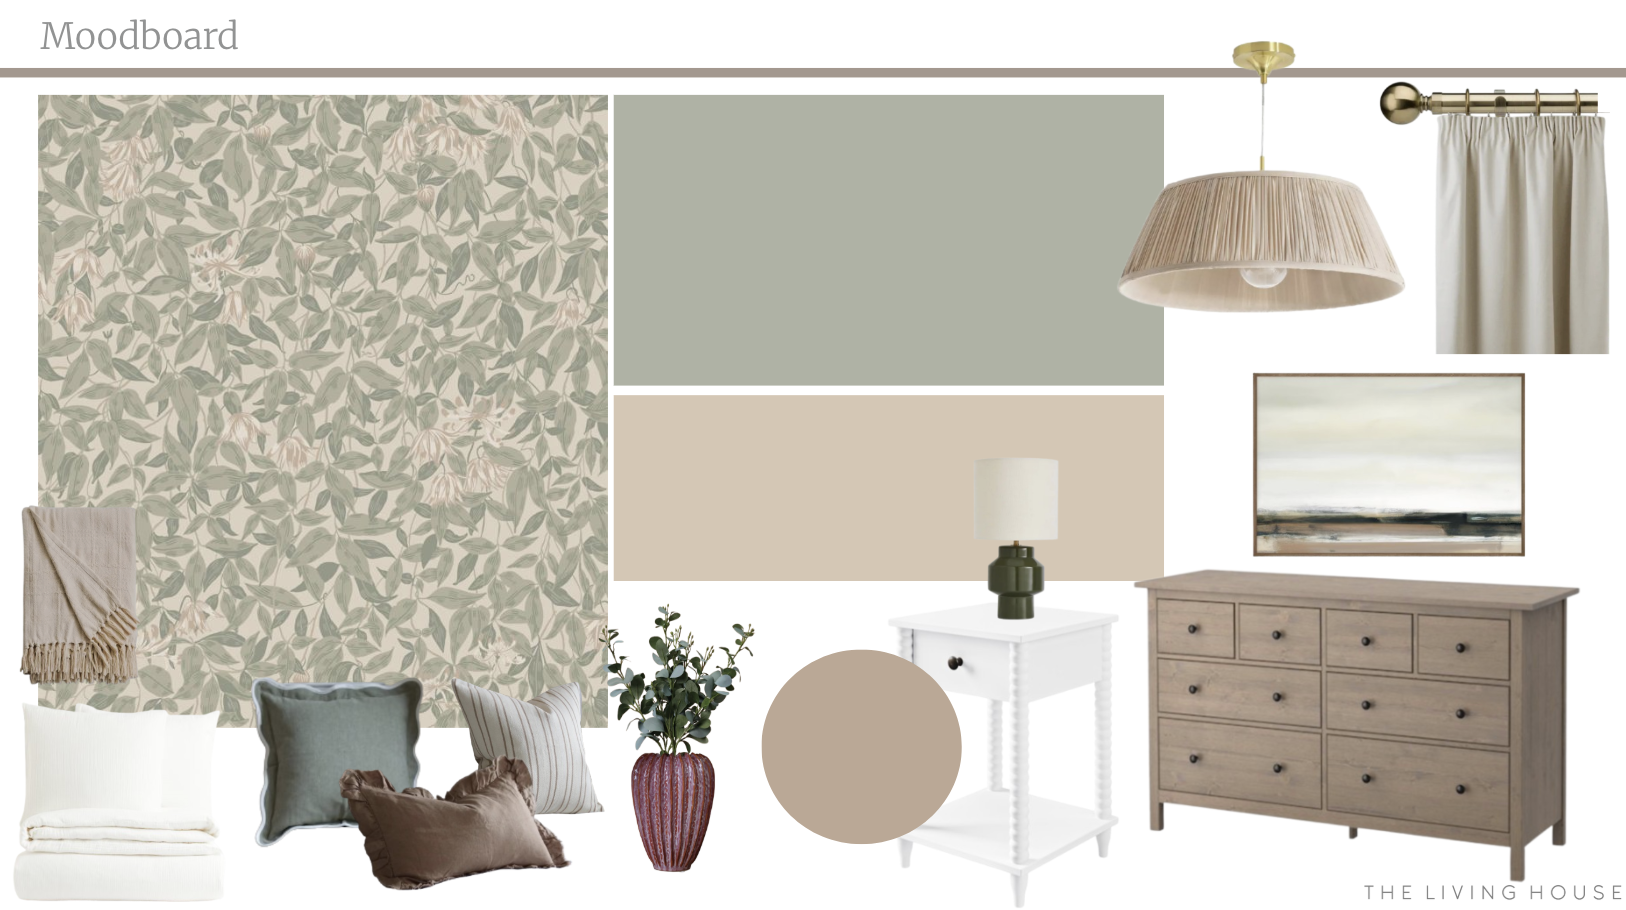
I decided to use Blue Gray on all the walls, ceiling, and radiator. I always paint the ceiling the same colour as the walls because it makes the space feel bigger. As a bonus, there’s no need for cutting in. I chose Joas White for the panelling and woodwork. To ensure the paint would be hard wearing and washable if any marks occurred, I opted for modern emulsion and modern eggshell finishes. Below is a list of the finishes I used for each area:
Walls - modern emulsion
Panelling - modern eggshell
Radiator - modern eggshell (painted in Blue Gray to blend in with the walls)
Bedside tables - modern eggshell
The panelling was from Homebase at the time and came from a company called EASipanel. They come in sheets, which makes installing panelling really easy (I’m not great at DIY, so this is where my brilliant uncle came to the rescue and helped). The ready made panelled sheets provided a beautiful finish, and I would recommend them if you're looking to add tongue and groove style panelling to your home. The panelling instantly added character to the room, which was exactly what I wanted. I chose to install the panelling at ¾ height, allowing plenty of room for the wallpaper to hang above. To add a detailed finish to the panelling, I added a piece of moulding similar to a dado rail, which completed the look.

Panelling fitted and ready to be primed
Once the ceilings were mist coated (painting ceilings is hard work, so I didn’t enjoy this part!), and the panelling was completed, it was time to move on to painting. It became a family project, and I got my mum involved with both the painting and wallpapering (apparently, I’m her most picky customer when it comes to making sure the wallpaper is straight—and her only customer, I may add!). It was so exciting to see the room and my vision come to life. The paint colours looked beautiful, and everything was coming together.
With the painting and wallpapering complete, it was time for the new carpet. I ordered the same style to run throughout the whole upstairs for a cohesive look. The new carpet instantly added warmth and a cosy feel, toning in well with the paint colours. I chose a synthetic carpet over wool for its longevity, as any spillage can usually be cleaned up, which is perfect for what could be a family home, and for me, as I’m known for spilling my drinks!

Panelling and walls painted, just the woodwork and wallpaper to complete

Painting and wallpapering complete, it was all coming together!
When it came to the furniture for my master bedroom, we already had our bed, which was fairly new from our previous house, so it needed to work with the design scheme. I searched endlessly for a chest of drawers that fit my price range, the right wood colour, size, and provided plenty of storage. However, the only options I could find were priced over £1,000, and with getting married and making changes to other rooms in the house, this wasn’t an option. Instead, I turned to Facebook Marketplace, set up alerts for chest of drawers, and something perfect came up, better yet, it was only £50! They were an IKEA set of drawers from a discounted range, well looked after and in fantastic condition. I hired a van the same day (unfortunately, I don’t think even one drawer would have fit in my Fiat 500!) and they were placed in their new home. They worked beautifully with the colour scheme, especially the wallpaper, pulling out the mushroom pink tones of the flowers and embracing the transitional feel I was trying to achieve to bring character to my master bedroom.

My Facebook Marketplace chest of drawers

Trying out different ways to style the chest of drawers, once they were in there new home!
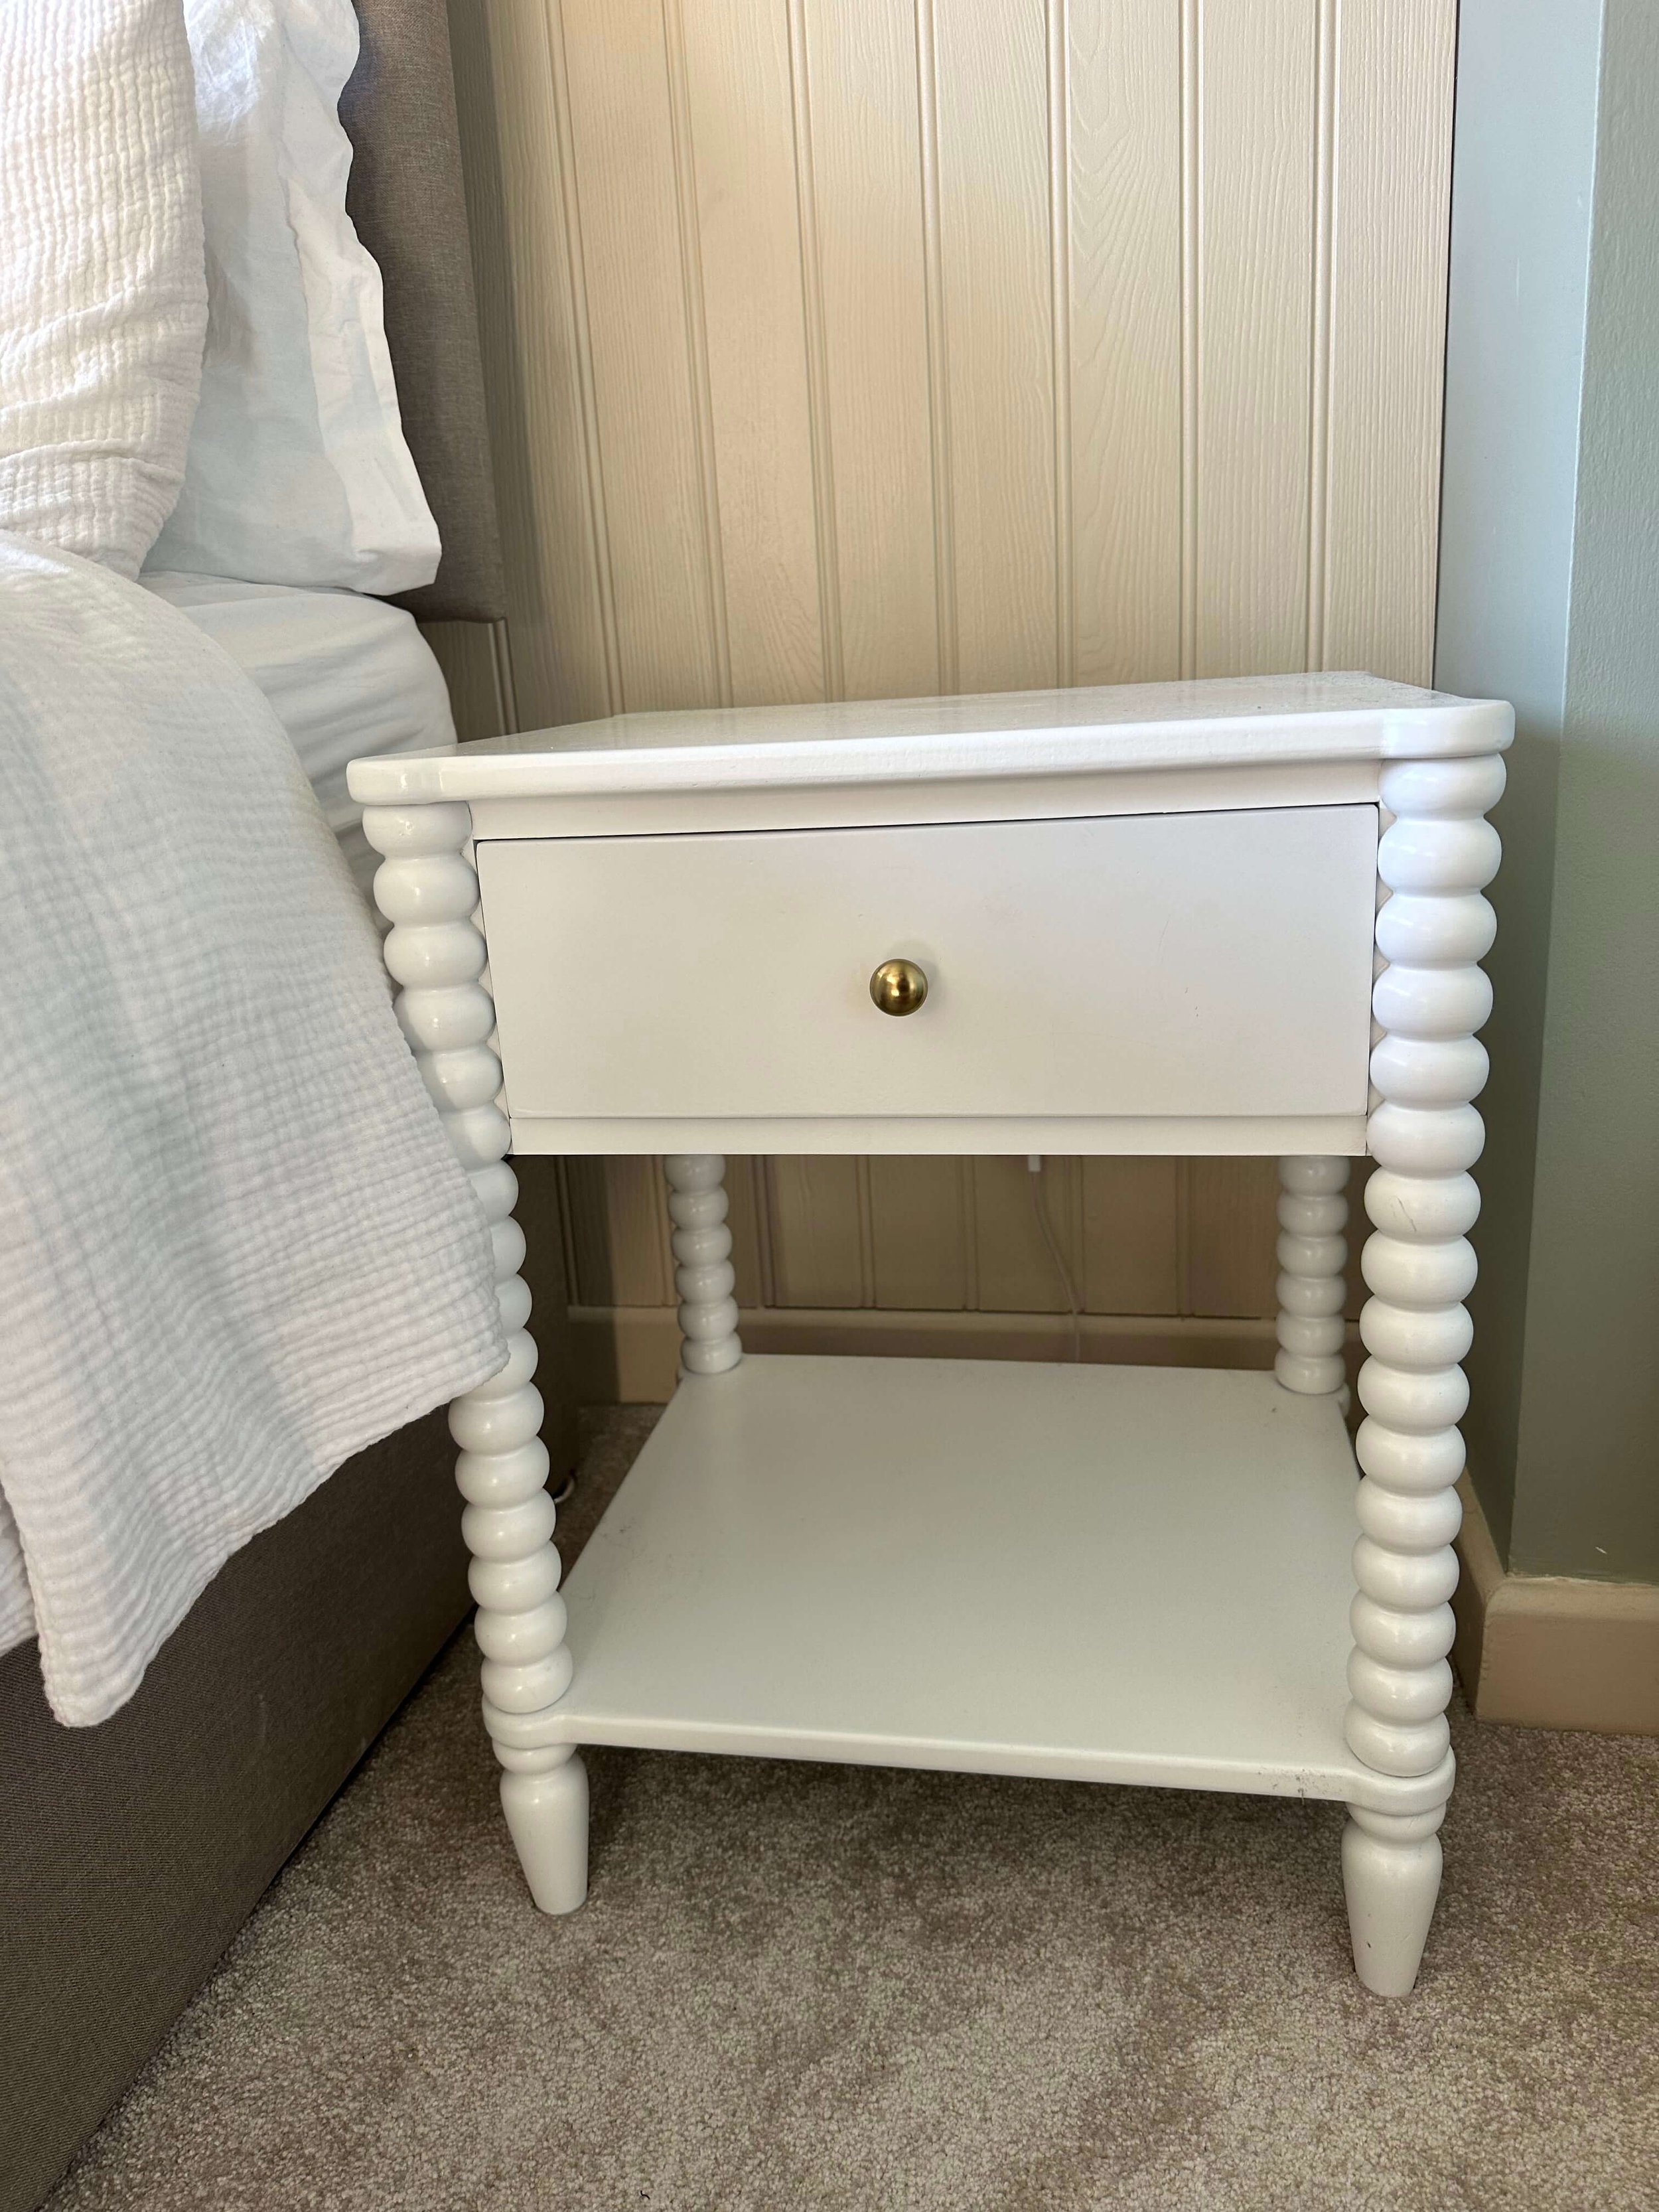
The other piece of furniture I needed to complete the room was bedside tables. Like the chest of drawers, I found ones I loved for £250 each. So, I took another look on Facebook Marketplace for something I could upcycle. This was definitely a trial and error process. I found a great set on Facebook Marketplace, but once I got them home, they just didn’t feel right. My hunt for bedside tables wasn't over, though. I decided to take a trip to one of my favourite home stores, Homesense, and stumbled upon white bobbin bedside tables for only £50 each. The shape, style, and size were perfect, but the white finish wasn’t quite right. Thankfully, it was nothing a tin of paint and a brush couldn’t fix!
Bedside tables before

Paint arrived, time to paint!

Smoked Trout close up
When looking at paint colours for the room, Smoked Trout was a shade that worked beautifully with Blue Gray, Joas White, and the wallpaper. I thought it would be the perfect colour to paint the bedside tables and complement the backdrop of Joas White. After a quick sand down and a few coats of paint, the bedside tables were completely transformed and looked so much more expensive. You know you're an interior designer when even bedside tables bring you so much joy!

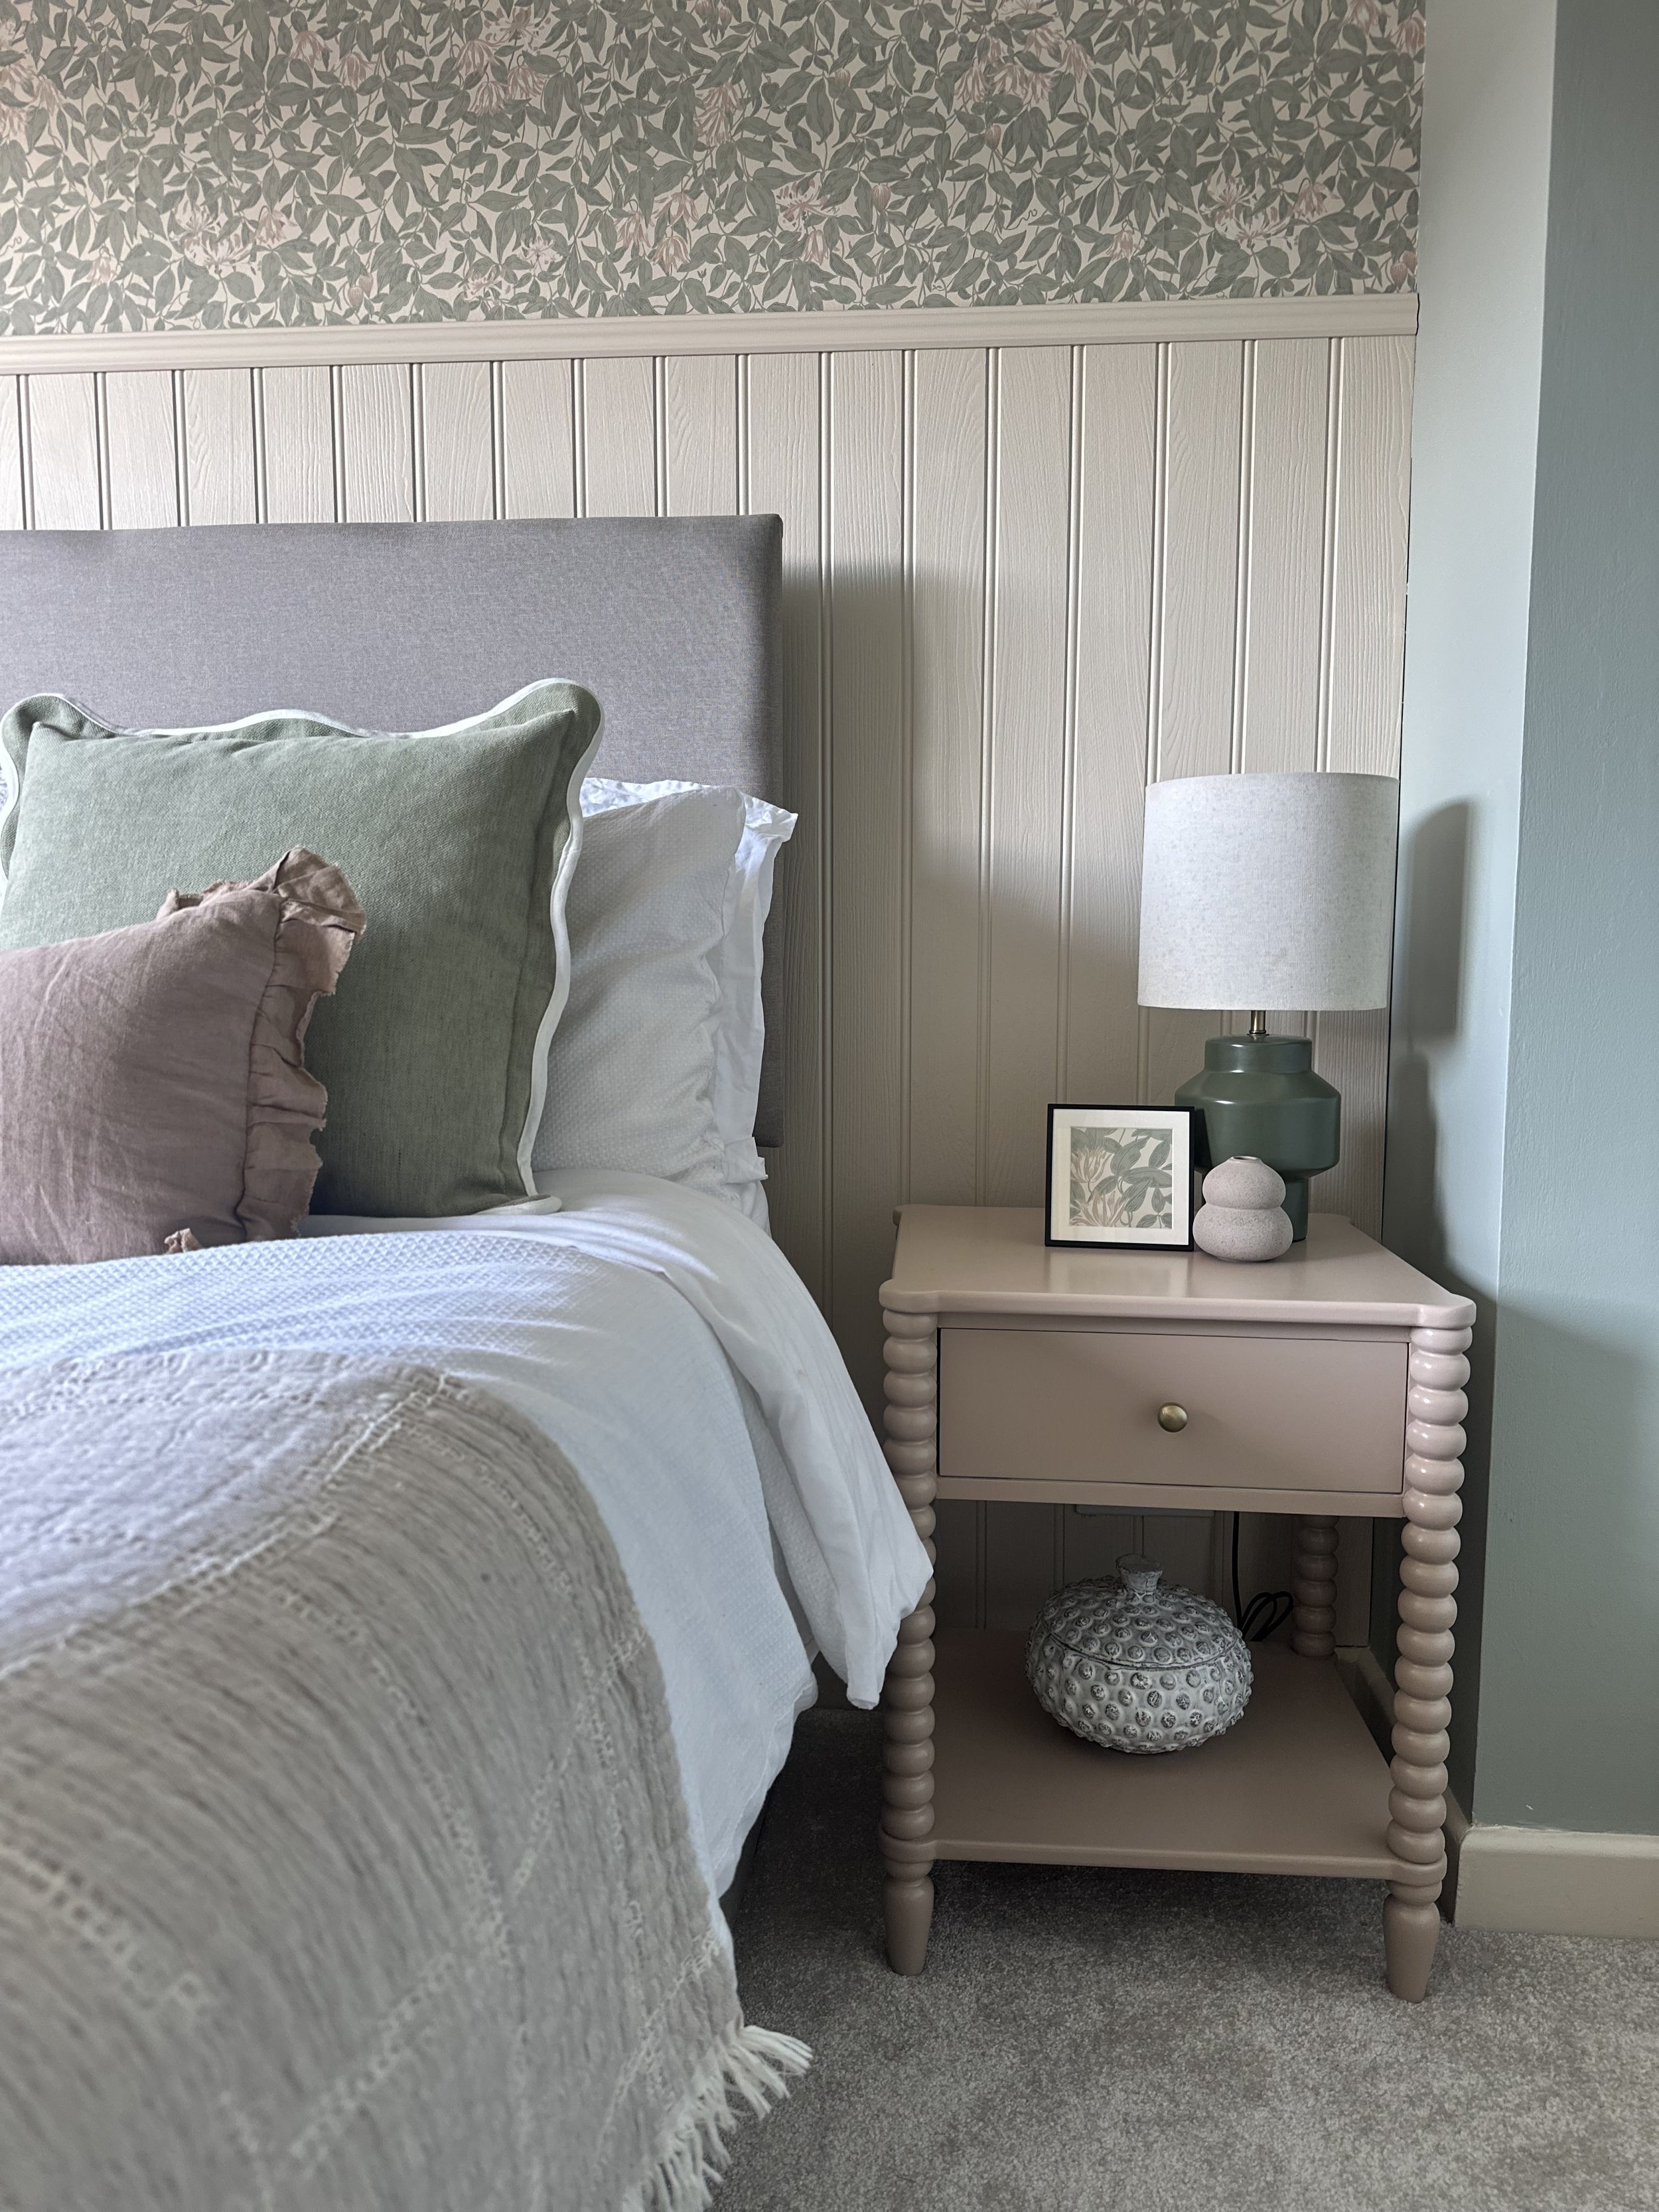
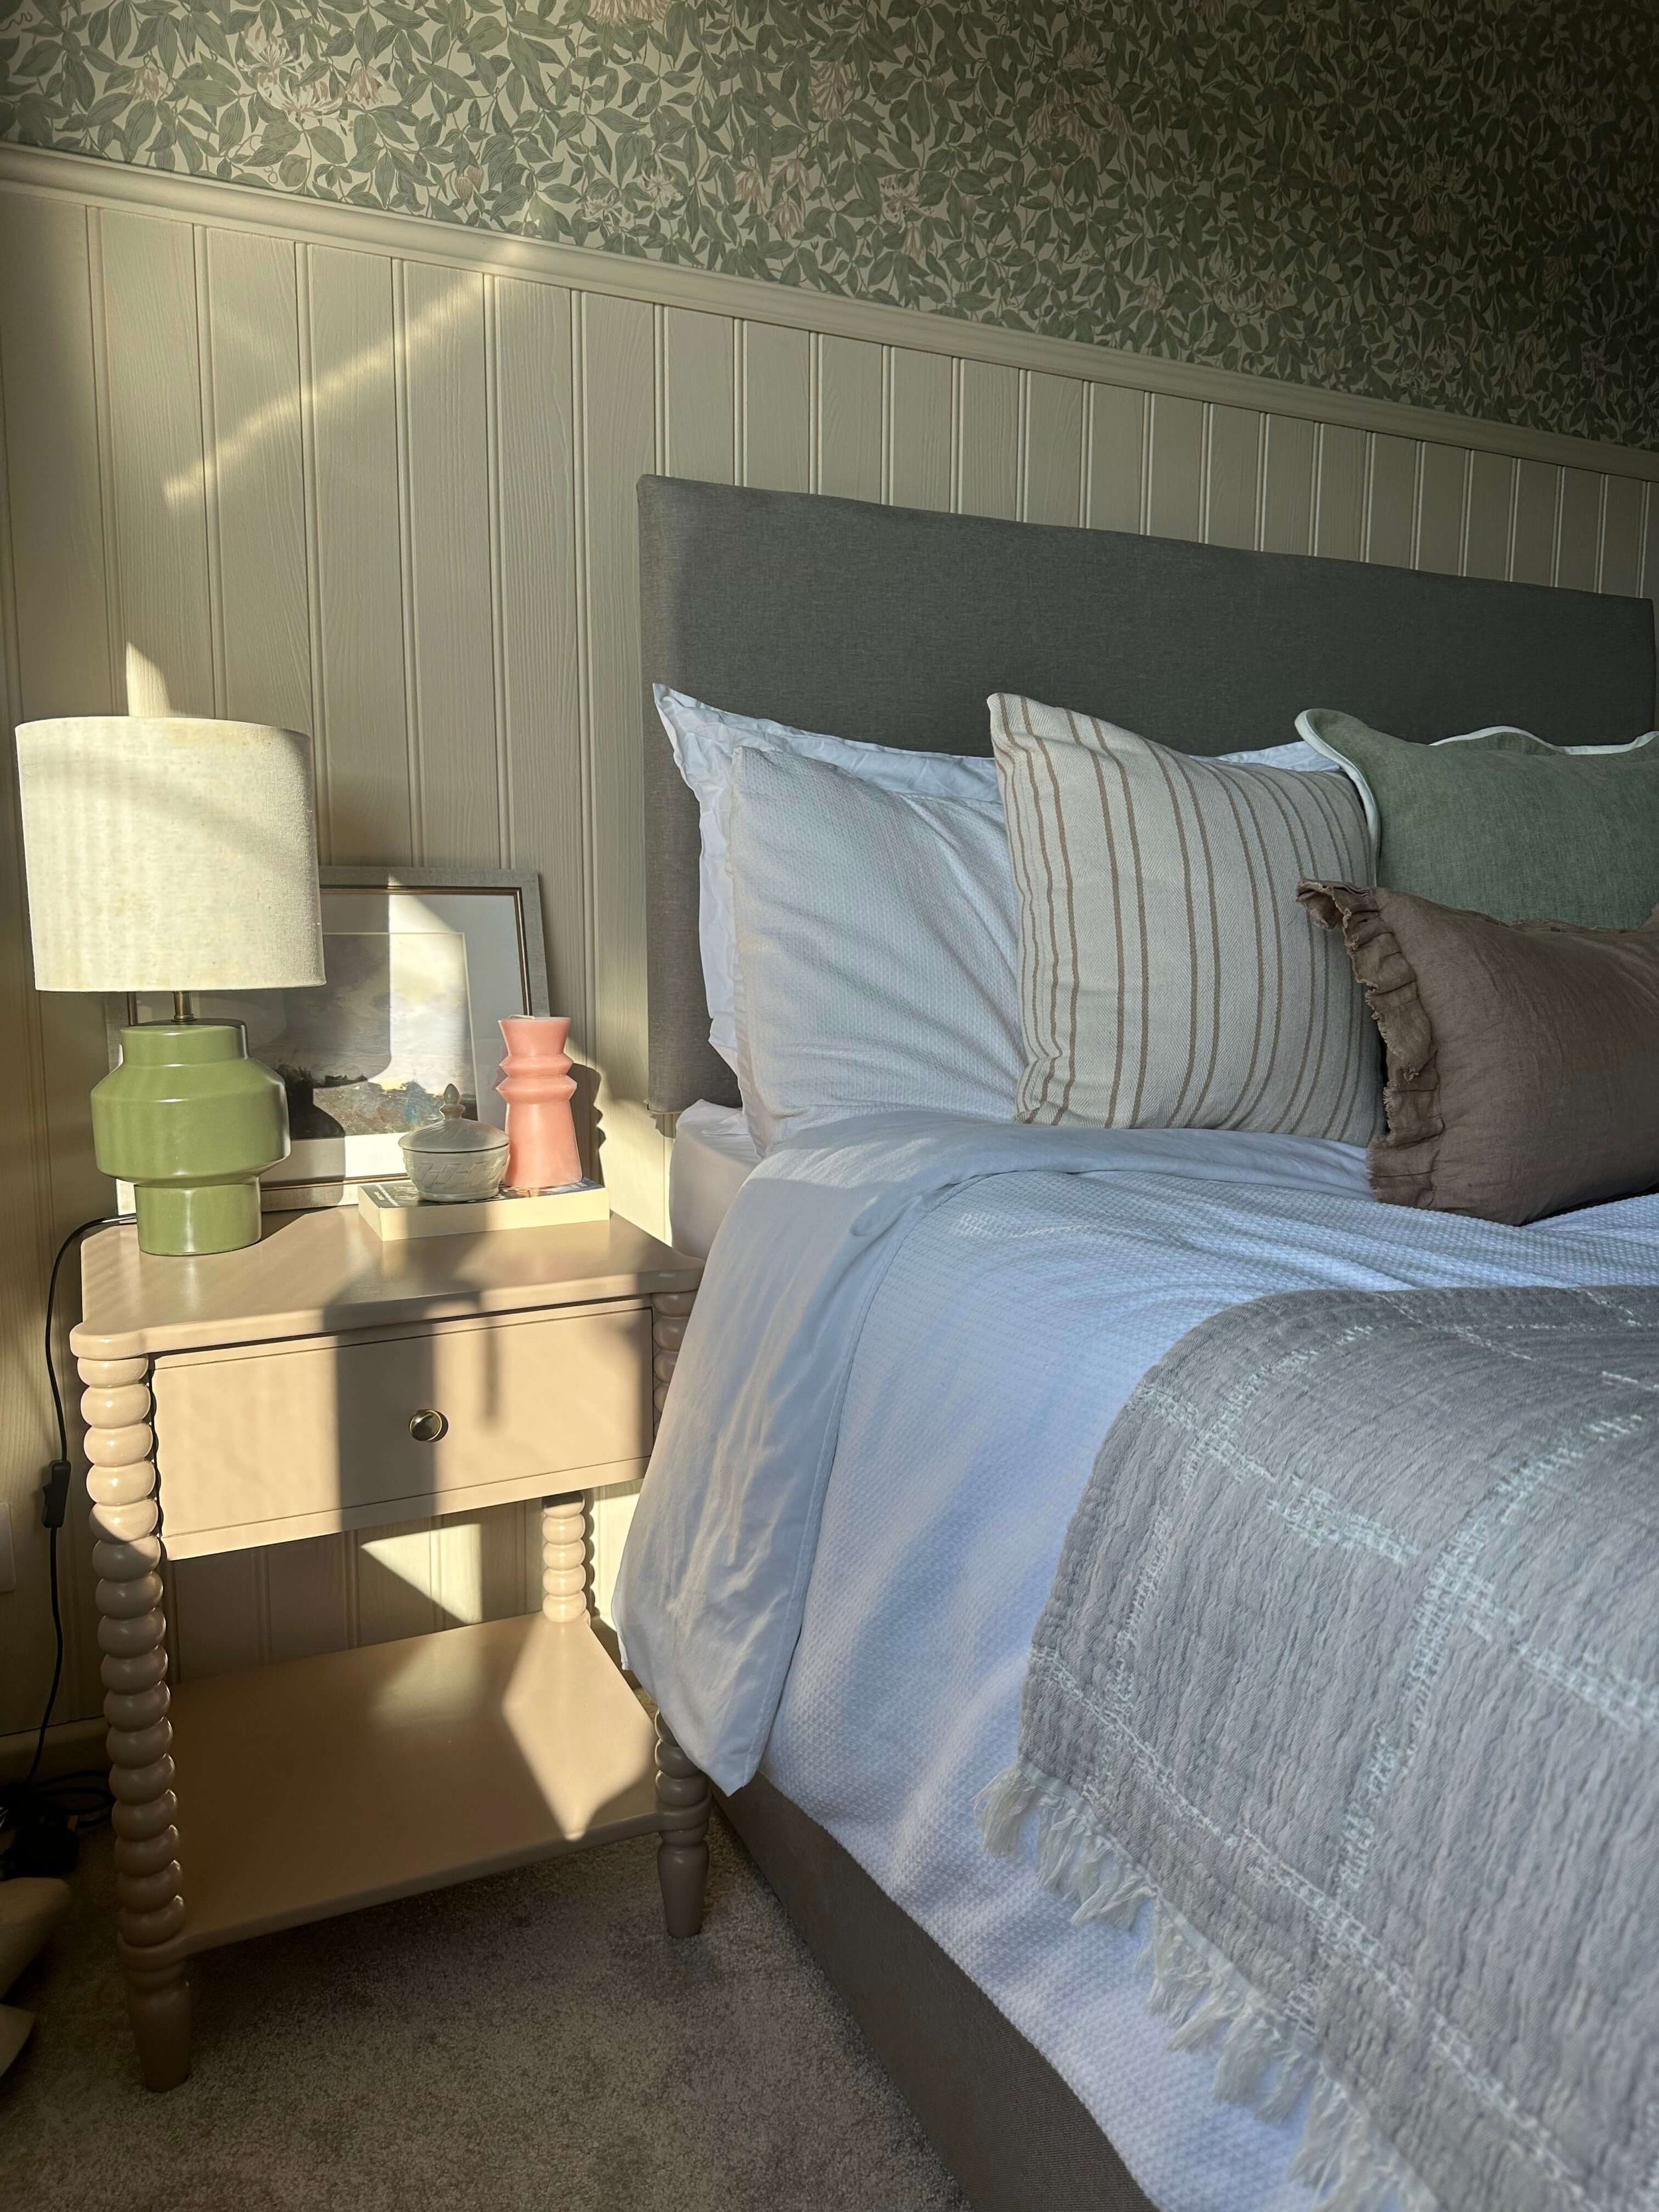
Bedside table painted in Smoked Trout by Farrow and Ball (Bobble pot gifted from Ivy Grey Interiors)
By now, you’ll have realised that I love creating beautiful rooms without breaking the bank, thanks to my Facebook Marketplace finds. When it came to the ceiling light, I wanted something that would soften the room and add a timeless, elegant touch. After searching for a while and considering styles like a scallop rattan light shade, I finally came across a ceiling light fitting from Argos, an absolute steal at just £33! It’s a great size, features the pleated fabric shade I was looking for, and has a gorgeous brass finish. It fits perfectly with my master bedroom’s style, and at that price, who could resist? Plus, it adds a soft, diffused glow, ideal for cosy evenings.
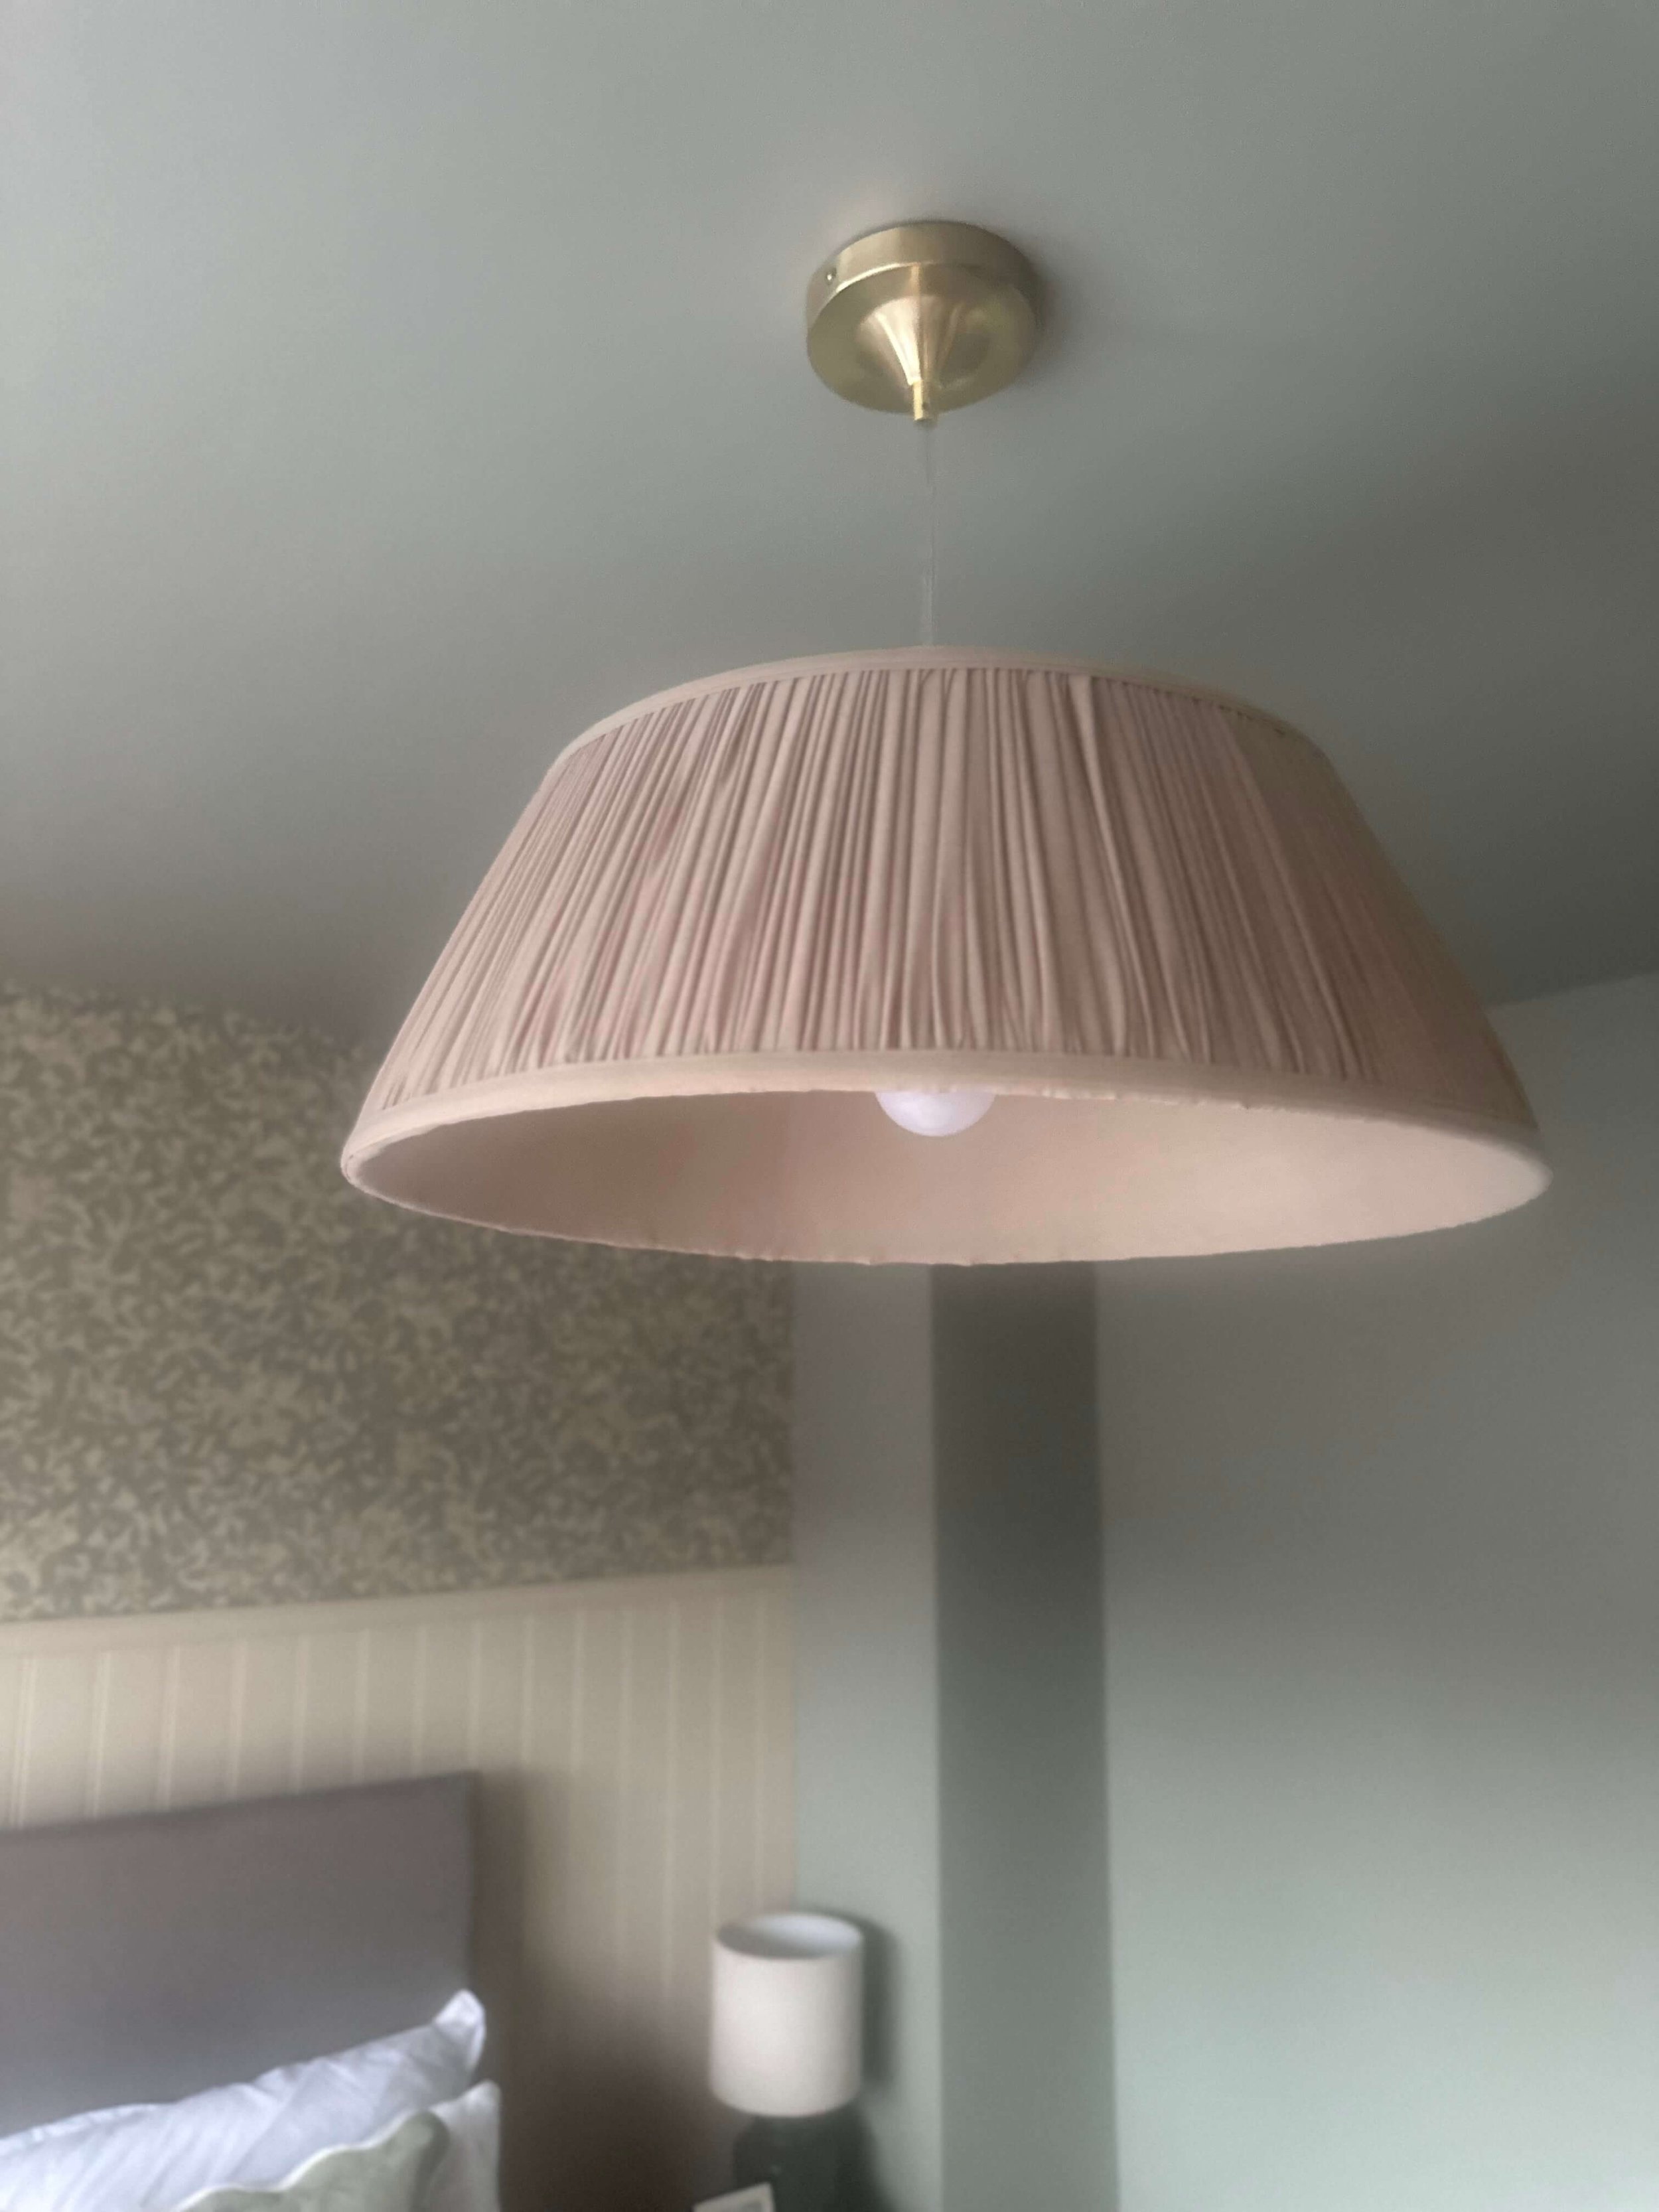
Ceiling light close up
For the window treatments, I wanted something simple yet practical, with a blackout lining for functionality and a relaxed, lived-in feel to complement the transitional style I was aiming for. I chose the Luna brushed blackout curtains from Dunelm with a pencil pleat heading for a timeless touch. To complete the look, I paired them with an antique brass curtain pole and installed it close to the ceiling to add height to the room. These curtains were a fantastic price, and I couldn’t be happier with them. They soften the large window beautifully and bring warmth and texture, making the space feel extra cosy.
Once the curtains were up, the room was taking shape and it was time for the finishing touches to complete the room and bring everything together. I found a beautiful abstract landscape framed canvas from Homesense to place above the chest of drawers, and accessories to style the room. One of my favourite accessories is the ribbed raspberry vase. It adds a depth of colour and height with the artificial eucalyptus stems, which was kindly gifted by Ivy Grey Interiors.
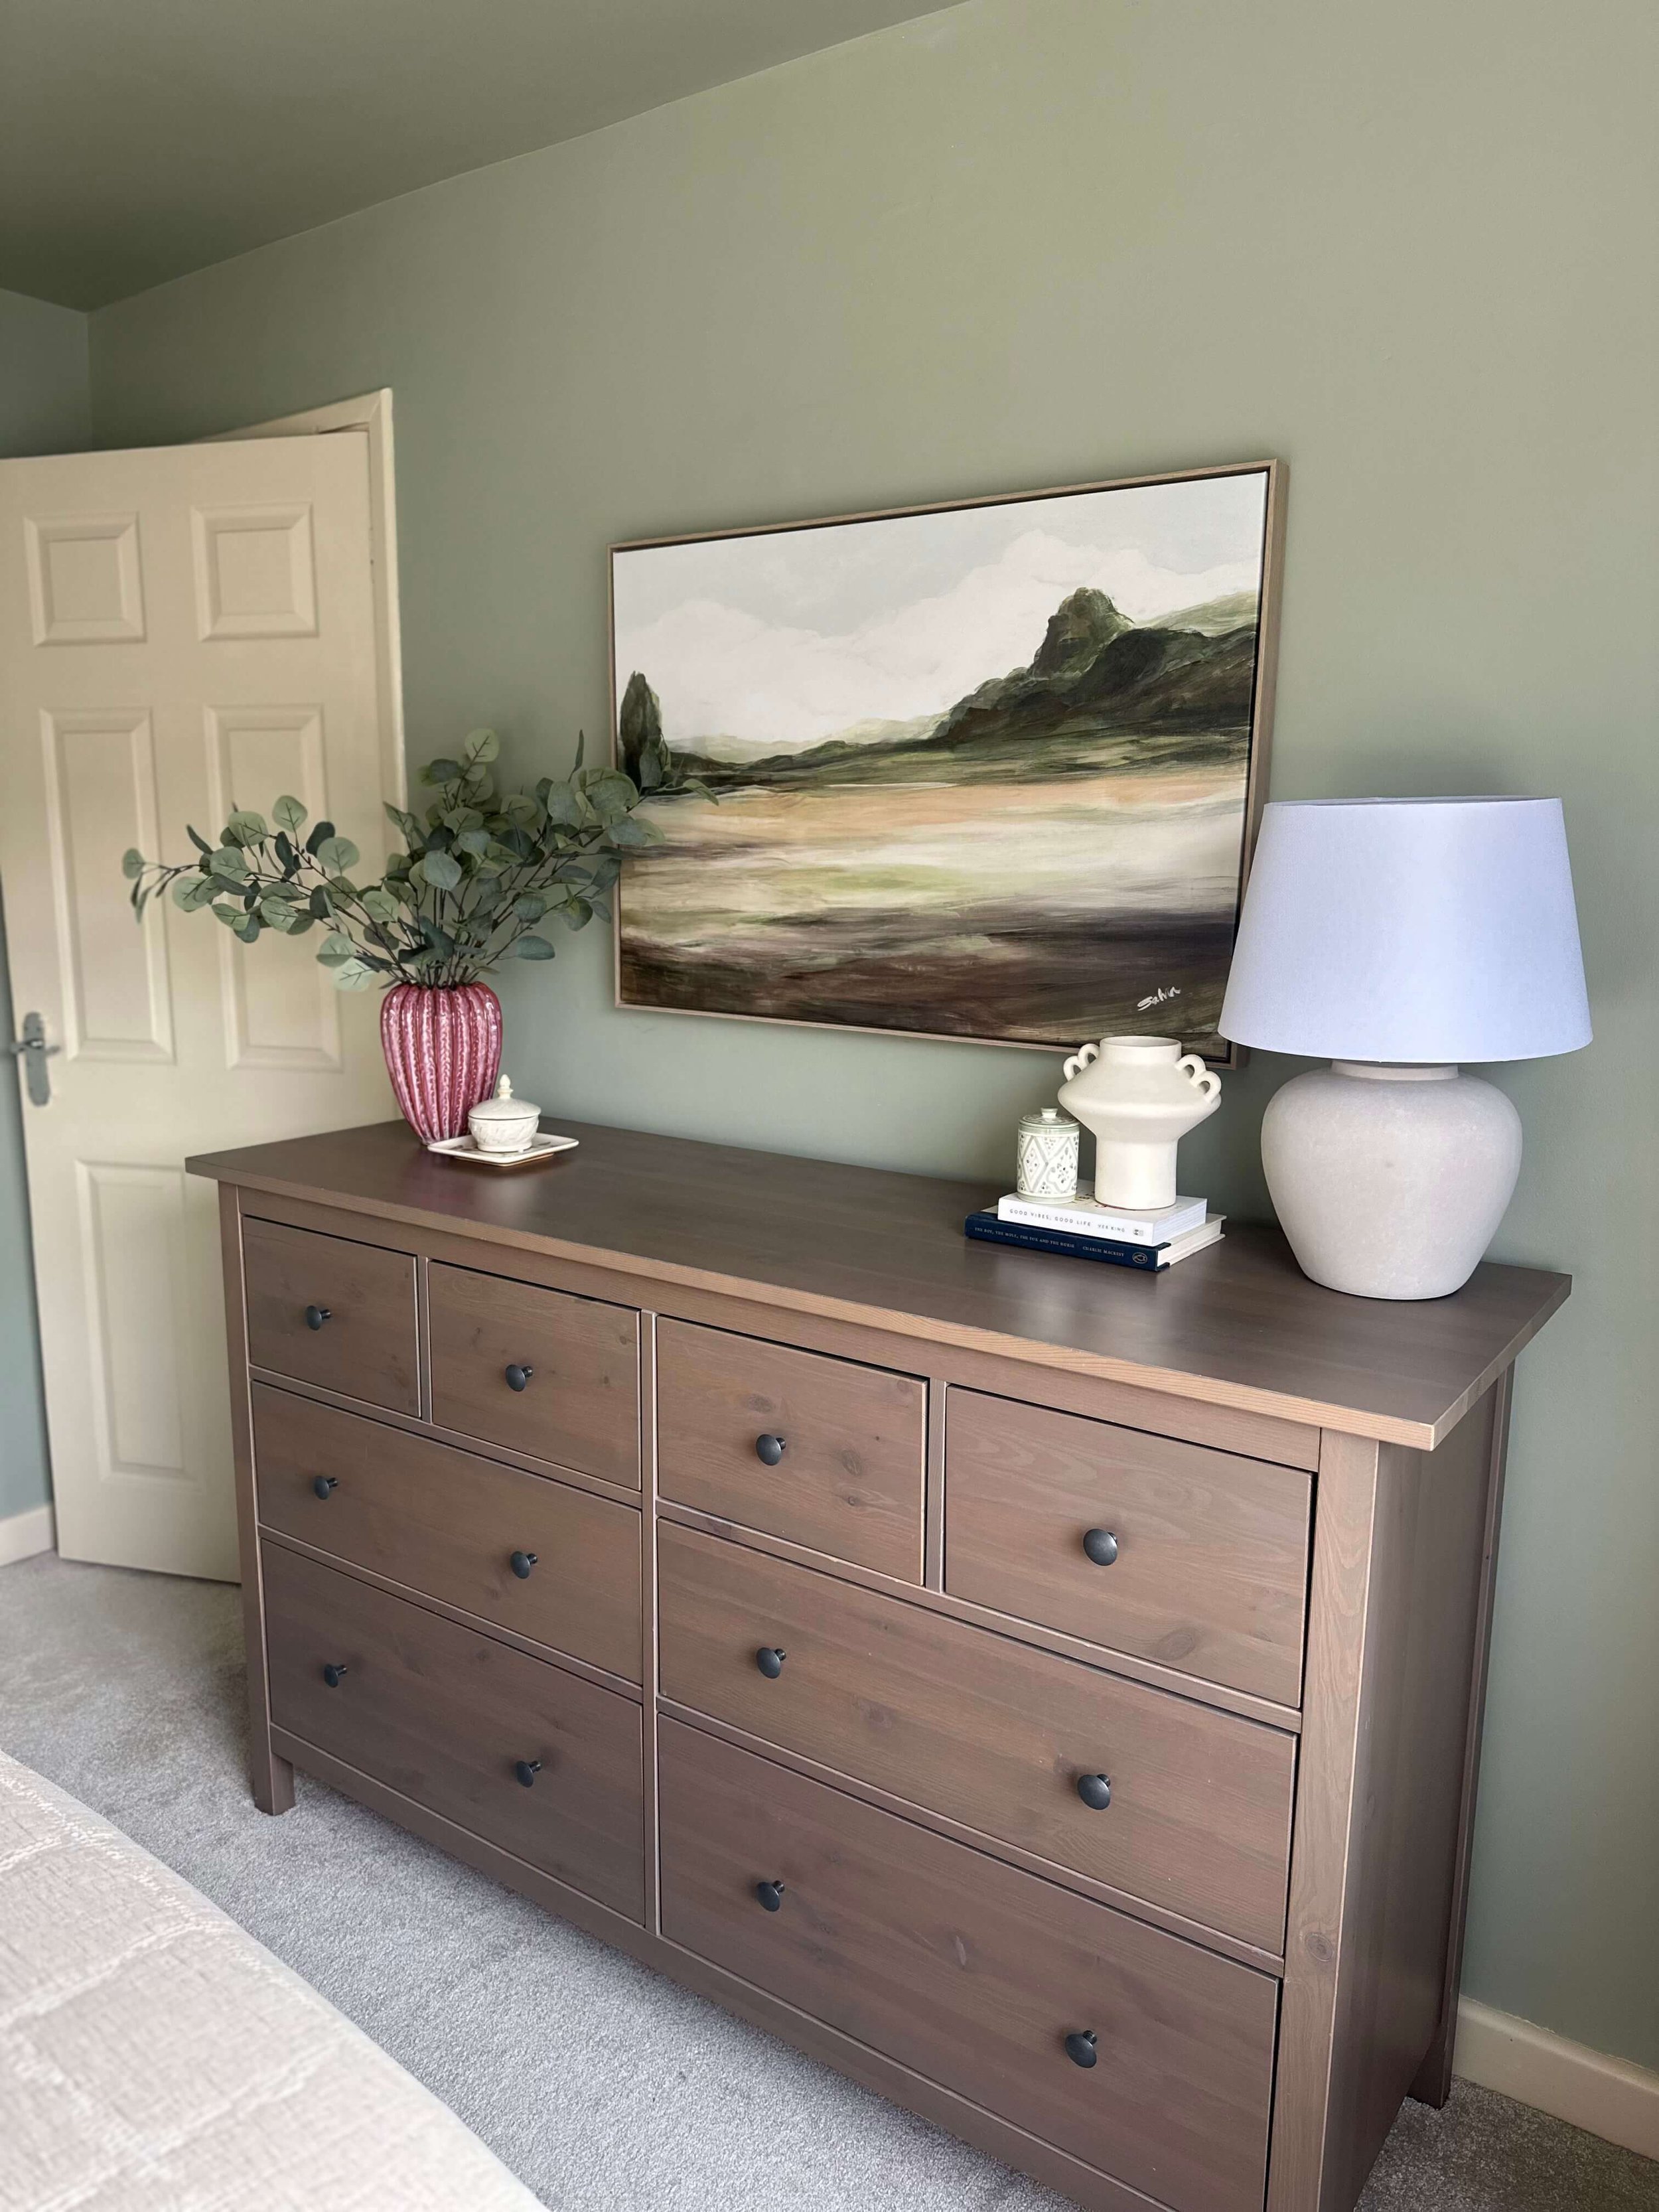
Chest of drawers styled with artwork above
To style the bed of course, cushions and a throw were needed (much to my fiancé Liam's annoyance, as he finds cushions on a bed completely pointless - an opinion that nearly resulted in the wedding being canceled). The gorgeous cushions are from Ellenvale Interiors, they have a beautiful range of cushions that are timeless and affordable too.
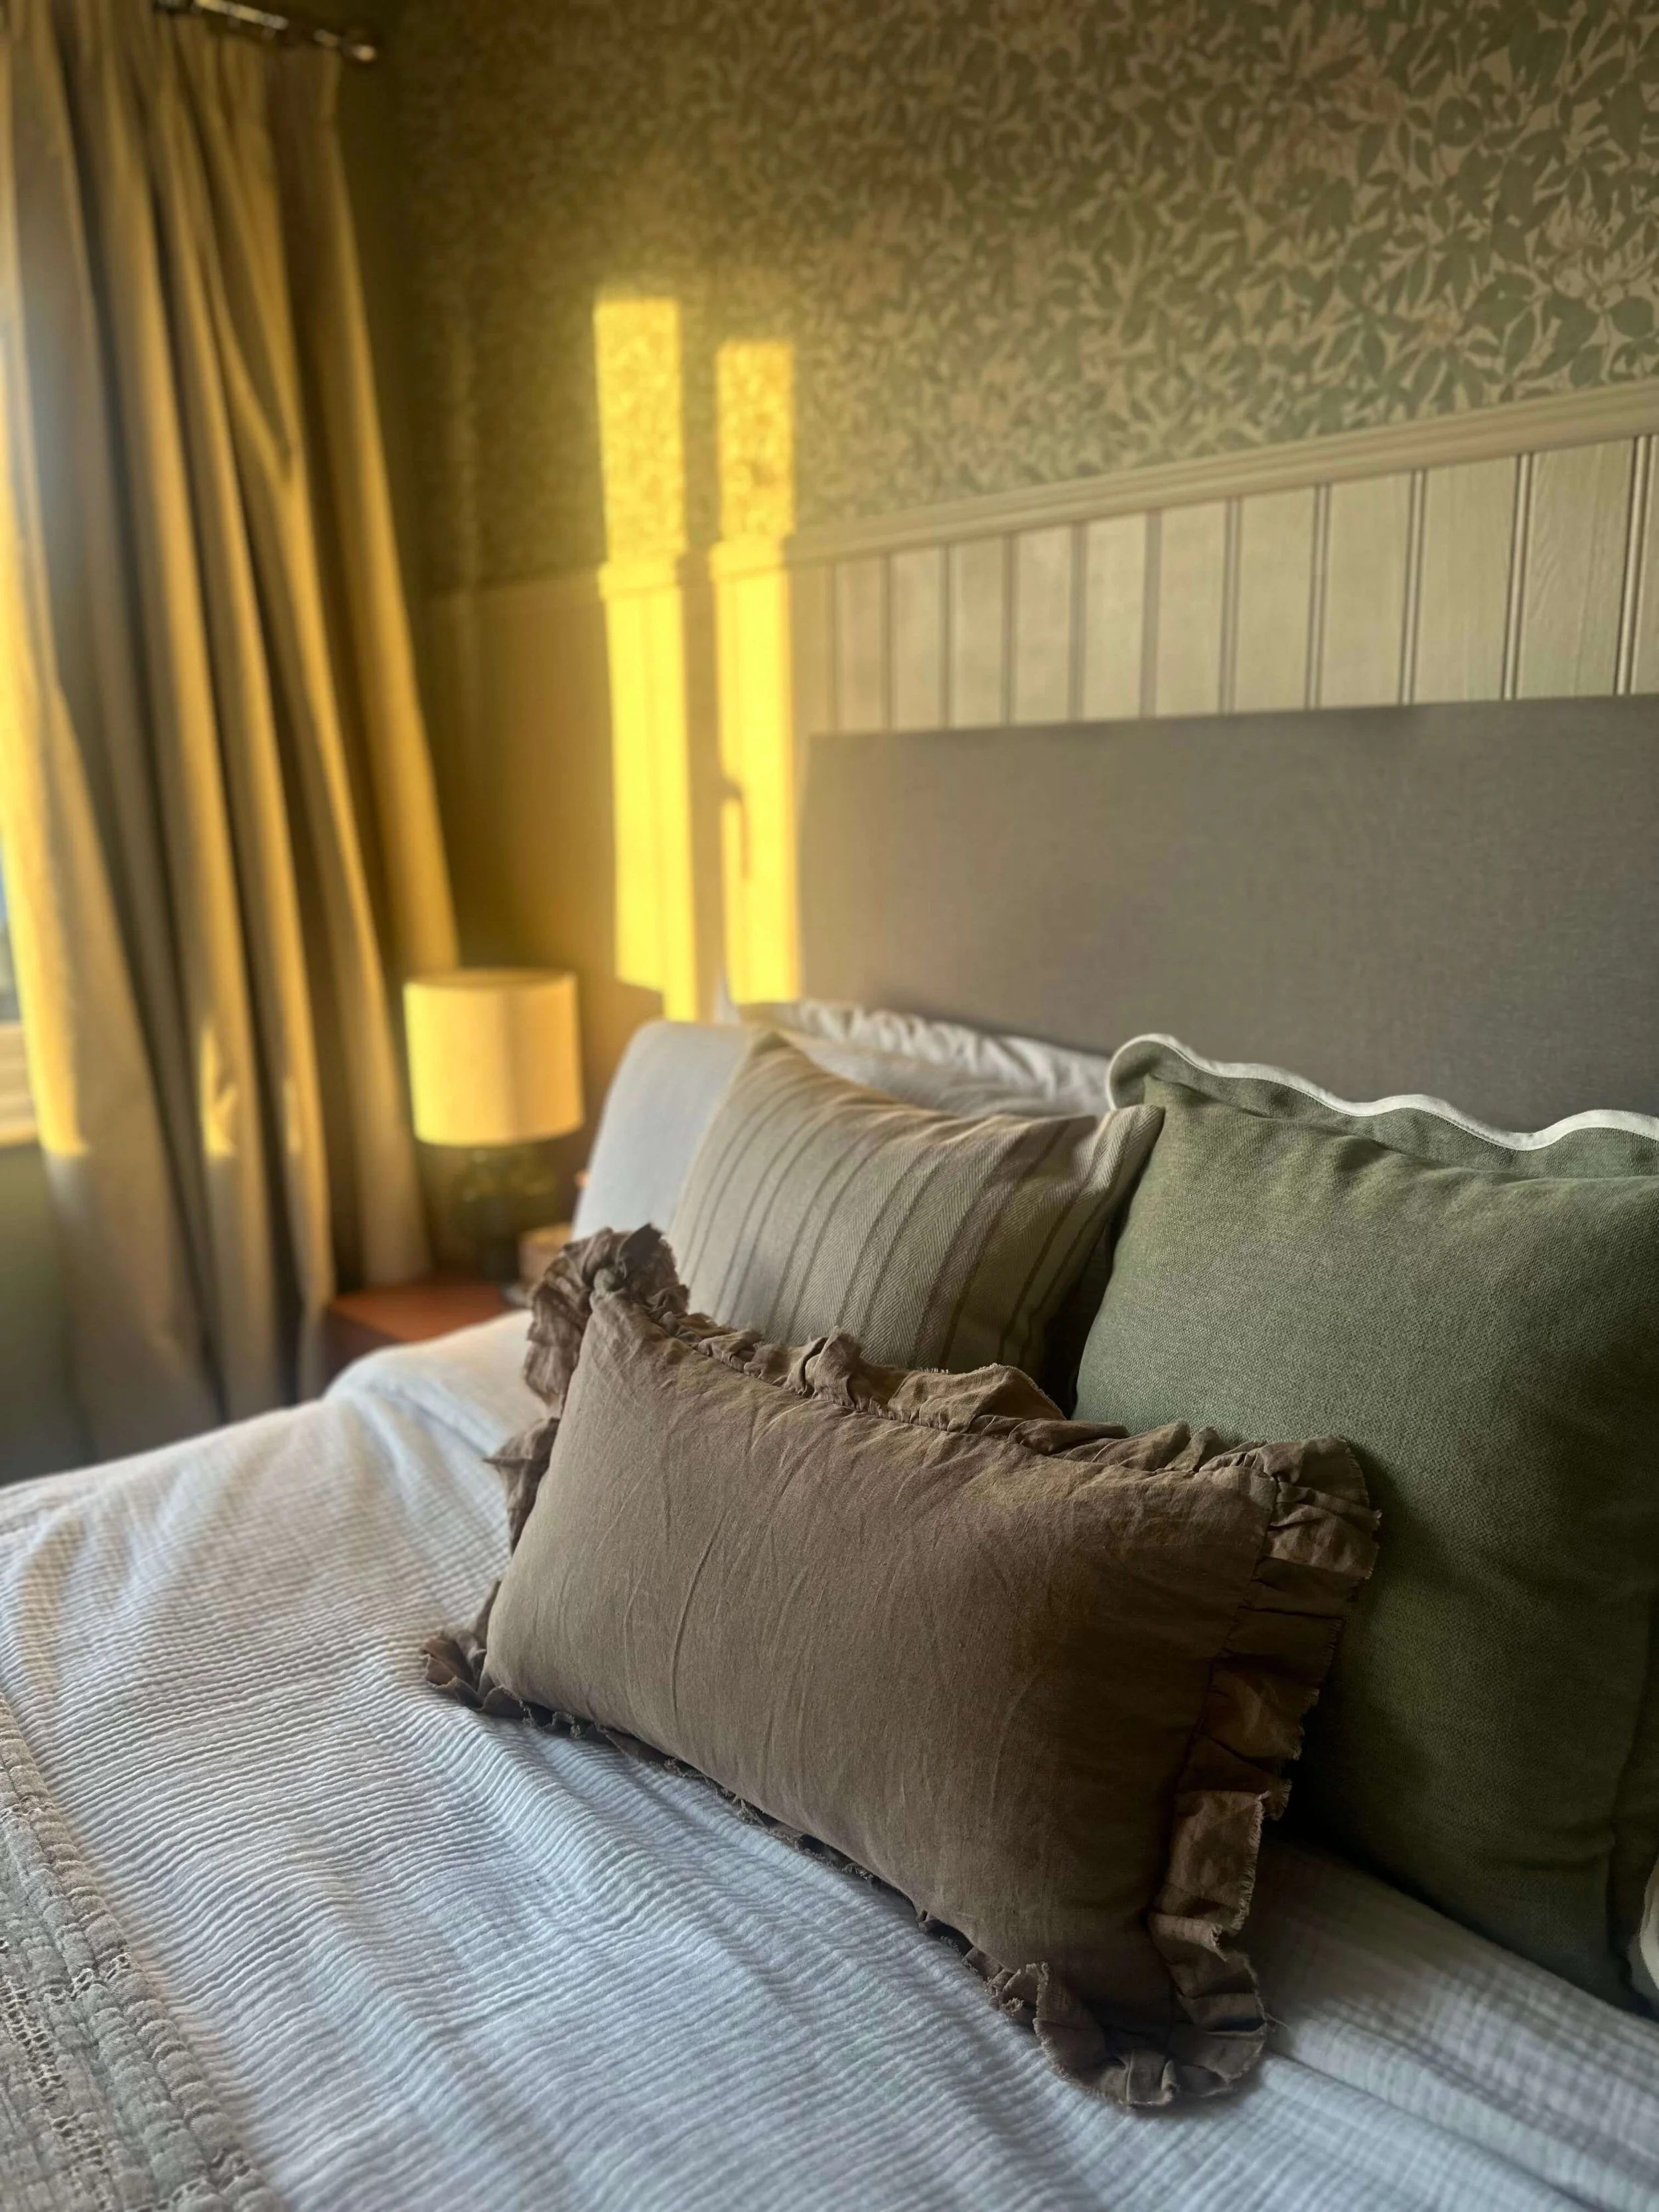
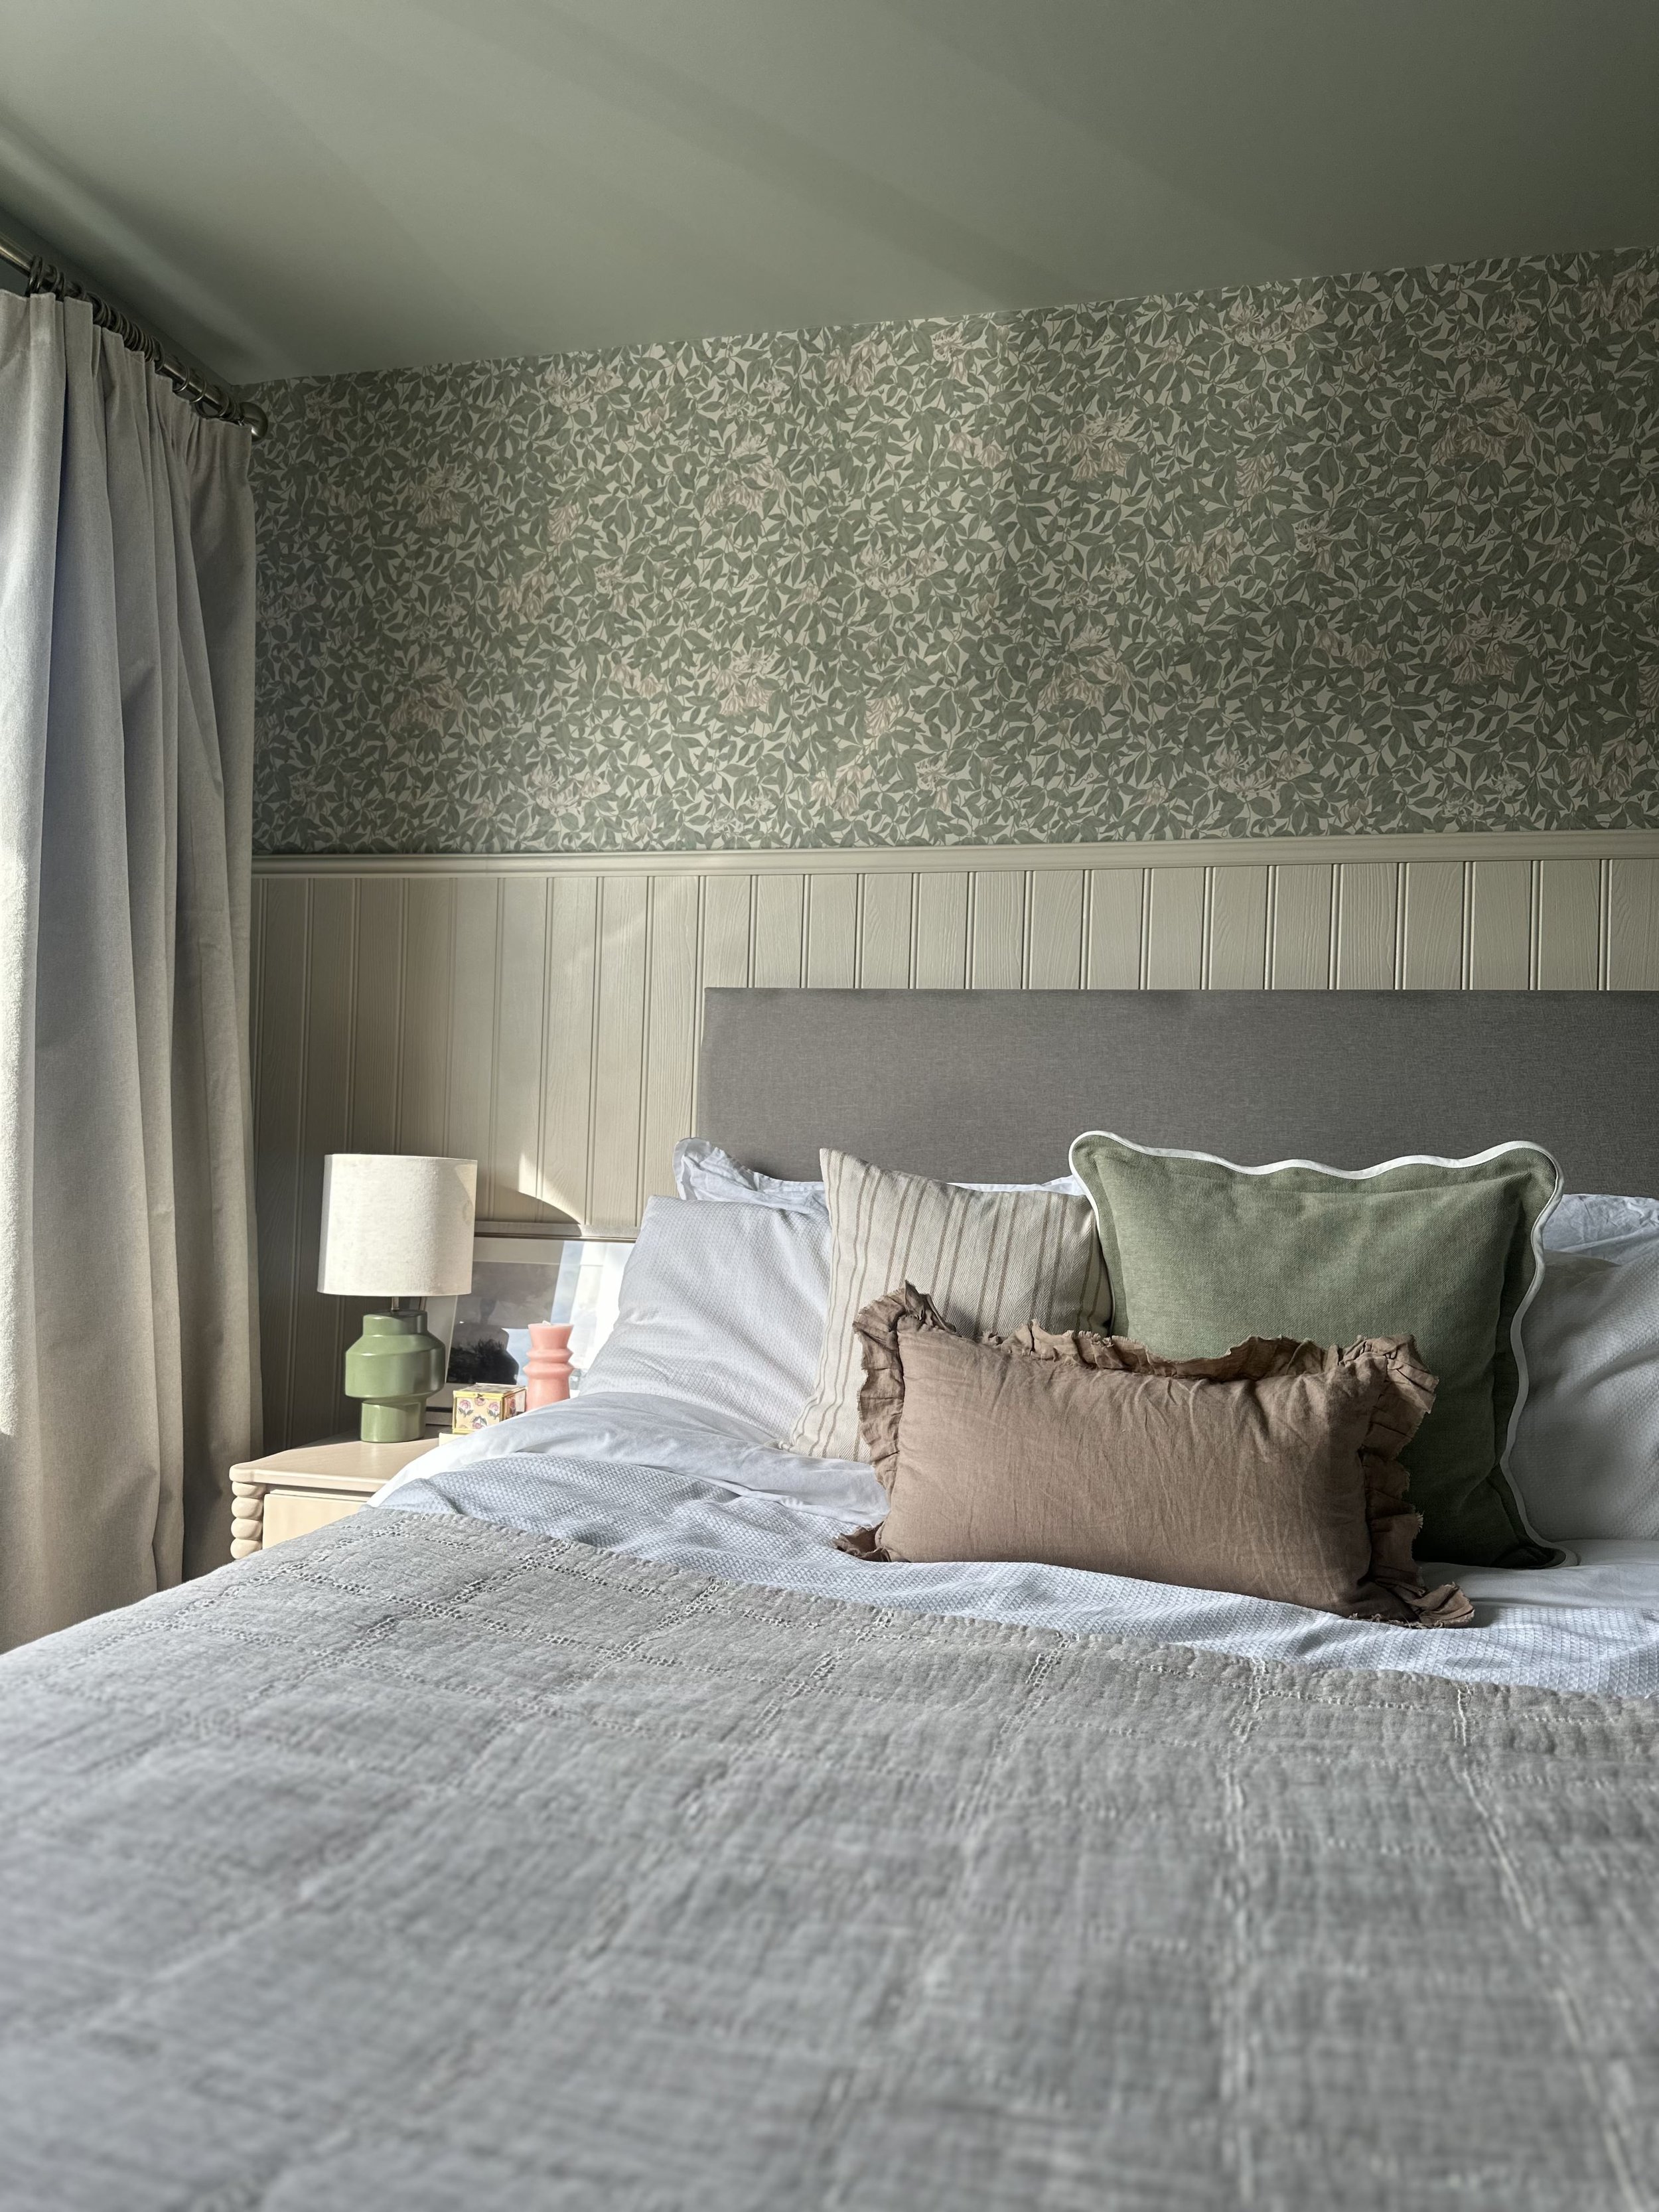

The whole room has slowly come together, and I couldn’t be happier. I now have the calm, cosy sanctuary I wanted, a place to relax and unwind after a long day. It’s my favourite room in the house. What I’ve loved most about designing my bedroom, like with every project, is seeing it come together and evolve over time. I’ve also enjoyed finding some amazing gems that have sparked my creativity, allowing me to upcycle, which has been so fulfilling. When you have a busy mind, something as simple as painting a pair of bedside tables becomes a joyous activity, a chance to switch off and focus.
Next on the project hit list is the living room. This is quite a big project, it’s a rectangle living room, where the layout is tricky, so this will be an interesting transformation to share with you in the not too distant future.
If you’re updating your home like I am but are feeling stuck, maybe you have ideas or even a wallpaper you’ve fallen in love with but don’t know what to do next or how to start designing your space. We’re here to help!
Just like I had my design friends, Catherine and Becky, share their thoughts on paints and colour schemes, we can be your design friends too! We’re here to make designing your home easy, fun, and enjoyable. No more endlessly scrolling for ideas after you've just put the kids to bed when all you want to do is relax—how good does that sound? You can find out how we can help and become your design friends with our interior design packages here.
RELATED BLOGS: